
Turning Your macOS Desktop into a Rotating Art Gallery with Backgroundifier
Sep 19, 2016 releases
The category of static visual art is in a bit of an awkward phase right now. Entertainment in the 21st century has evolved to actively engage our minds and senses, to the point where movies, music, games, and even audiobooks require little more than putting on a pair of headphones or fixing our vision to the nearest screen. Where does the immense body of work from genres such as fine art, photography, and illustration fit into this world? Museums — physical beasts that they are — can hardly be visited on a whim, and as of yet there’s (sadly) no Spotify for visual art. Meanwhile, hundreds of amazing works are posted daily on Instagram, DeviantArt, and Reddit. How do we find the time to fit them into our content-saturated lives? And how do we return to view the works we’ve already enjoyed?
For several years, I wanted to create a sort of “digital museum” that would give me random, on-demand access to this very important side of the art world. The constraints weren’t complicated. All I needed was a large amount of art along with a mechanism that would randomly show me new works from this collection every fifteen minutes or so. But while acquiring the art was hardly a problem, there were relatively few areas in my life where I could idly display images. Screensavers? Showed up too infrequently and weren’t easily controllable. Wallpapers? Couldn’t deal with arbitrary aspect ratios. I thought I had my solution when I ran the Google Art Project in a full-screen browser tab on a second monitor, but the selection turned out to be too limited and I could no longer rely on the luxury of having more than one display when I set out on my travels.
(As an aside, Clay Bavor solved this exact problem in hardware by creating a digital photo frame that automatically compensated for ambient light. Amazing solution! But I’m a software guy, so…)
After discovering Chris Tomkins-Tinch’s Artful app which turned your desktop wallpaper into a rotating collection of fine art, I realized that I had given the humble desktop too little consideration. With a simple Gaussian blur, a soft drop shadow, and a sprinkle of magic, it was in fact quite simple to create dynamic backgrounds for images at practically any aspect ratio. But Artful was designed to automatically pull images from proprietary sources, whereas I already had a sizable “inspiration” folder of collected art that I wanted to add to the mix. I also wished to keep my system as clean and simple as possible: Artful interfaced directly with your system preferences, but I much preferred to just keep a wallpaper folder that I’d occasionally drop new images into. And so a new app was born: Backgroundifier, a native converter droplet that let you easily turn arbitrary images into lovely desktop wallpapers.
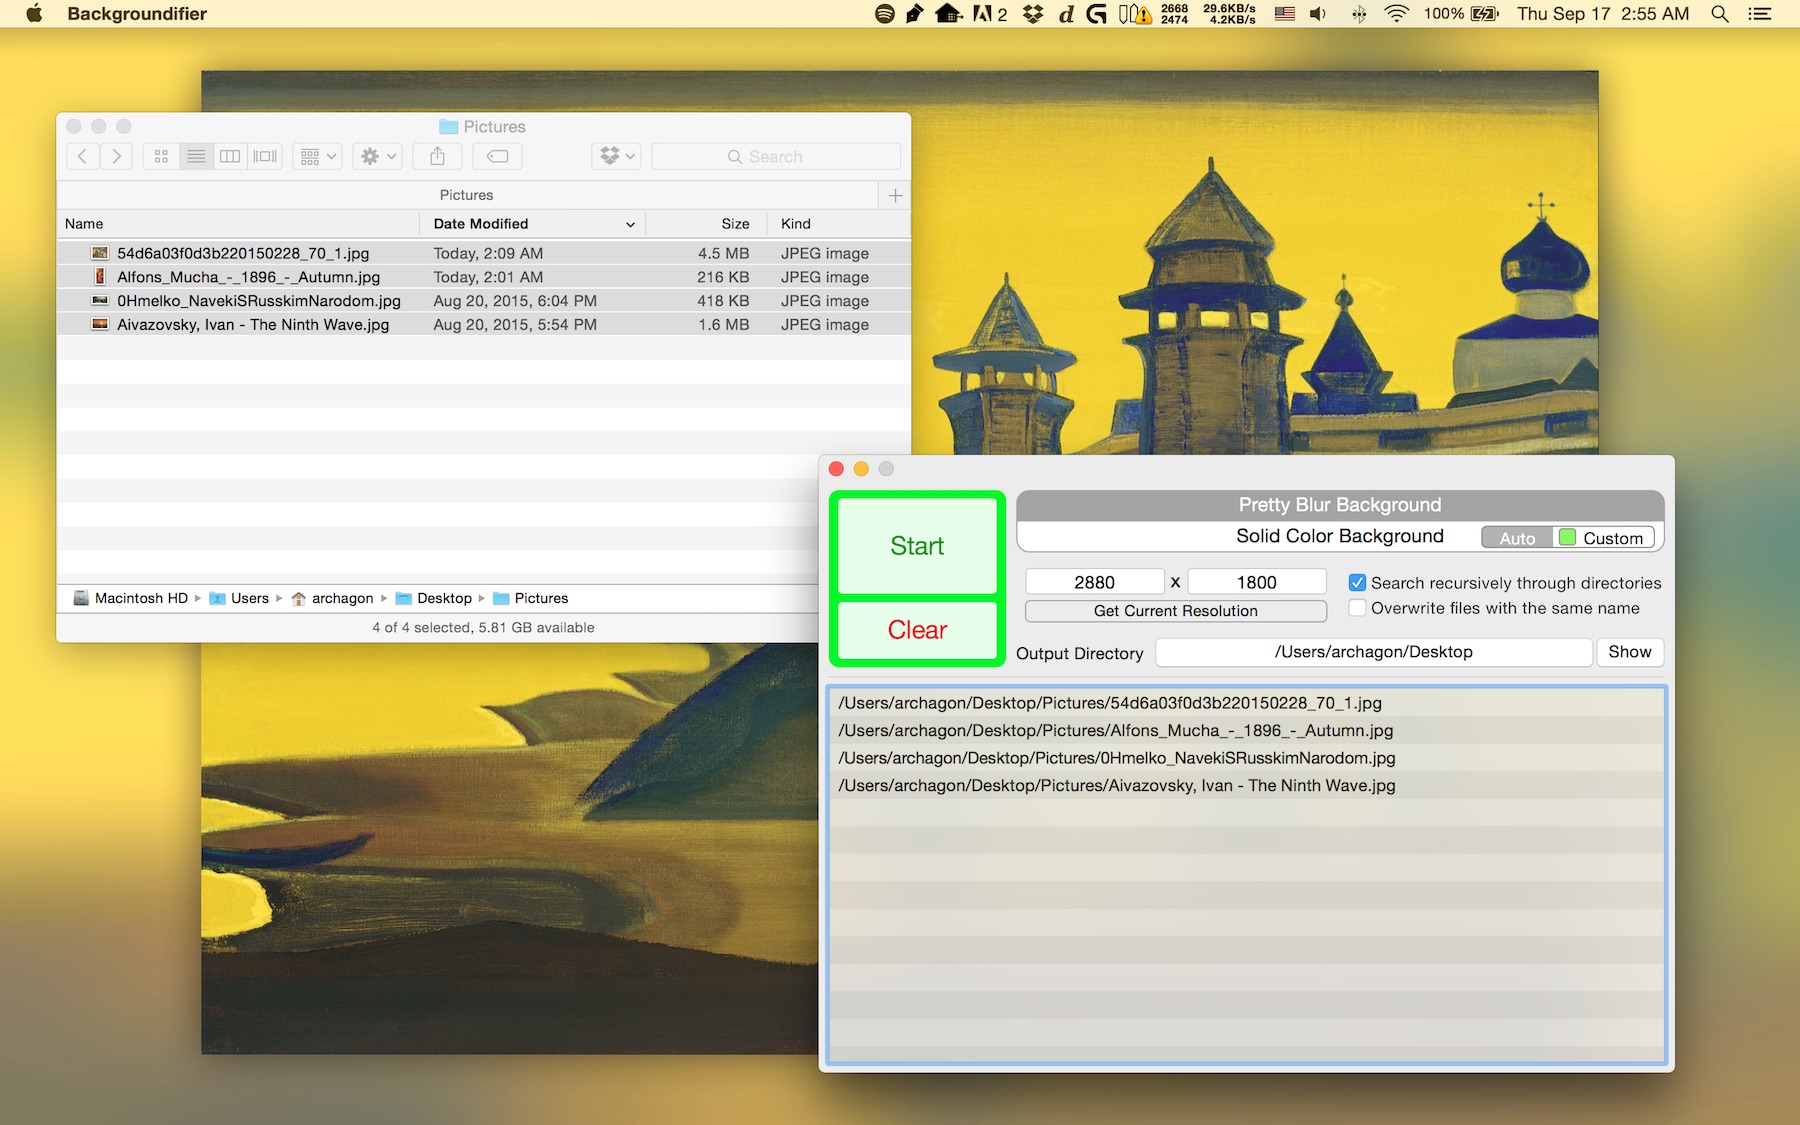
Just having this app around increased my consumption of art tremendously. But it wasn’t enough. I wanted to bridge the gap between finding an image on the web and having it appear in my desktop rotation, and I also wanted to be able to show new works of art on a whim. Fortunately, macOS is no slouch! Using Backgroundifier’s command-line mode, Automator, and the native power of Mission Control and Spaces, I’ve finally been able to create the digital museum experience I’ve always wanted.
Naturally, the process begins with finding the art.
Where’s the Art?
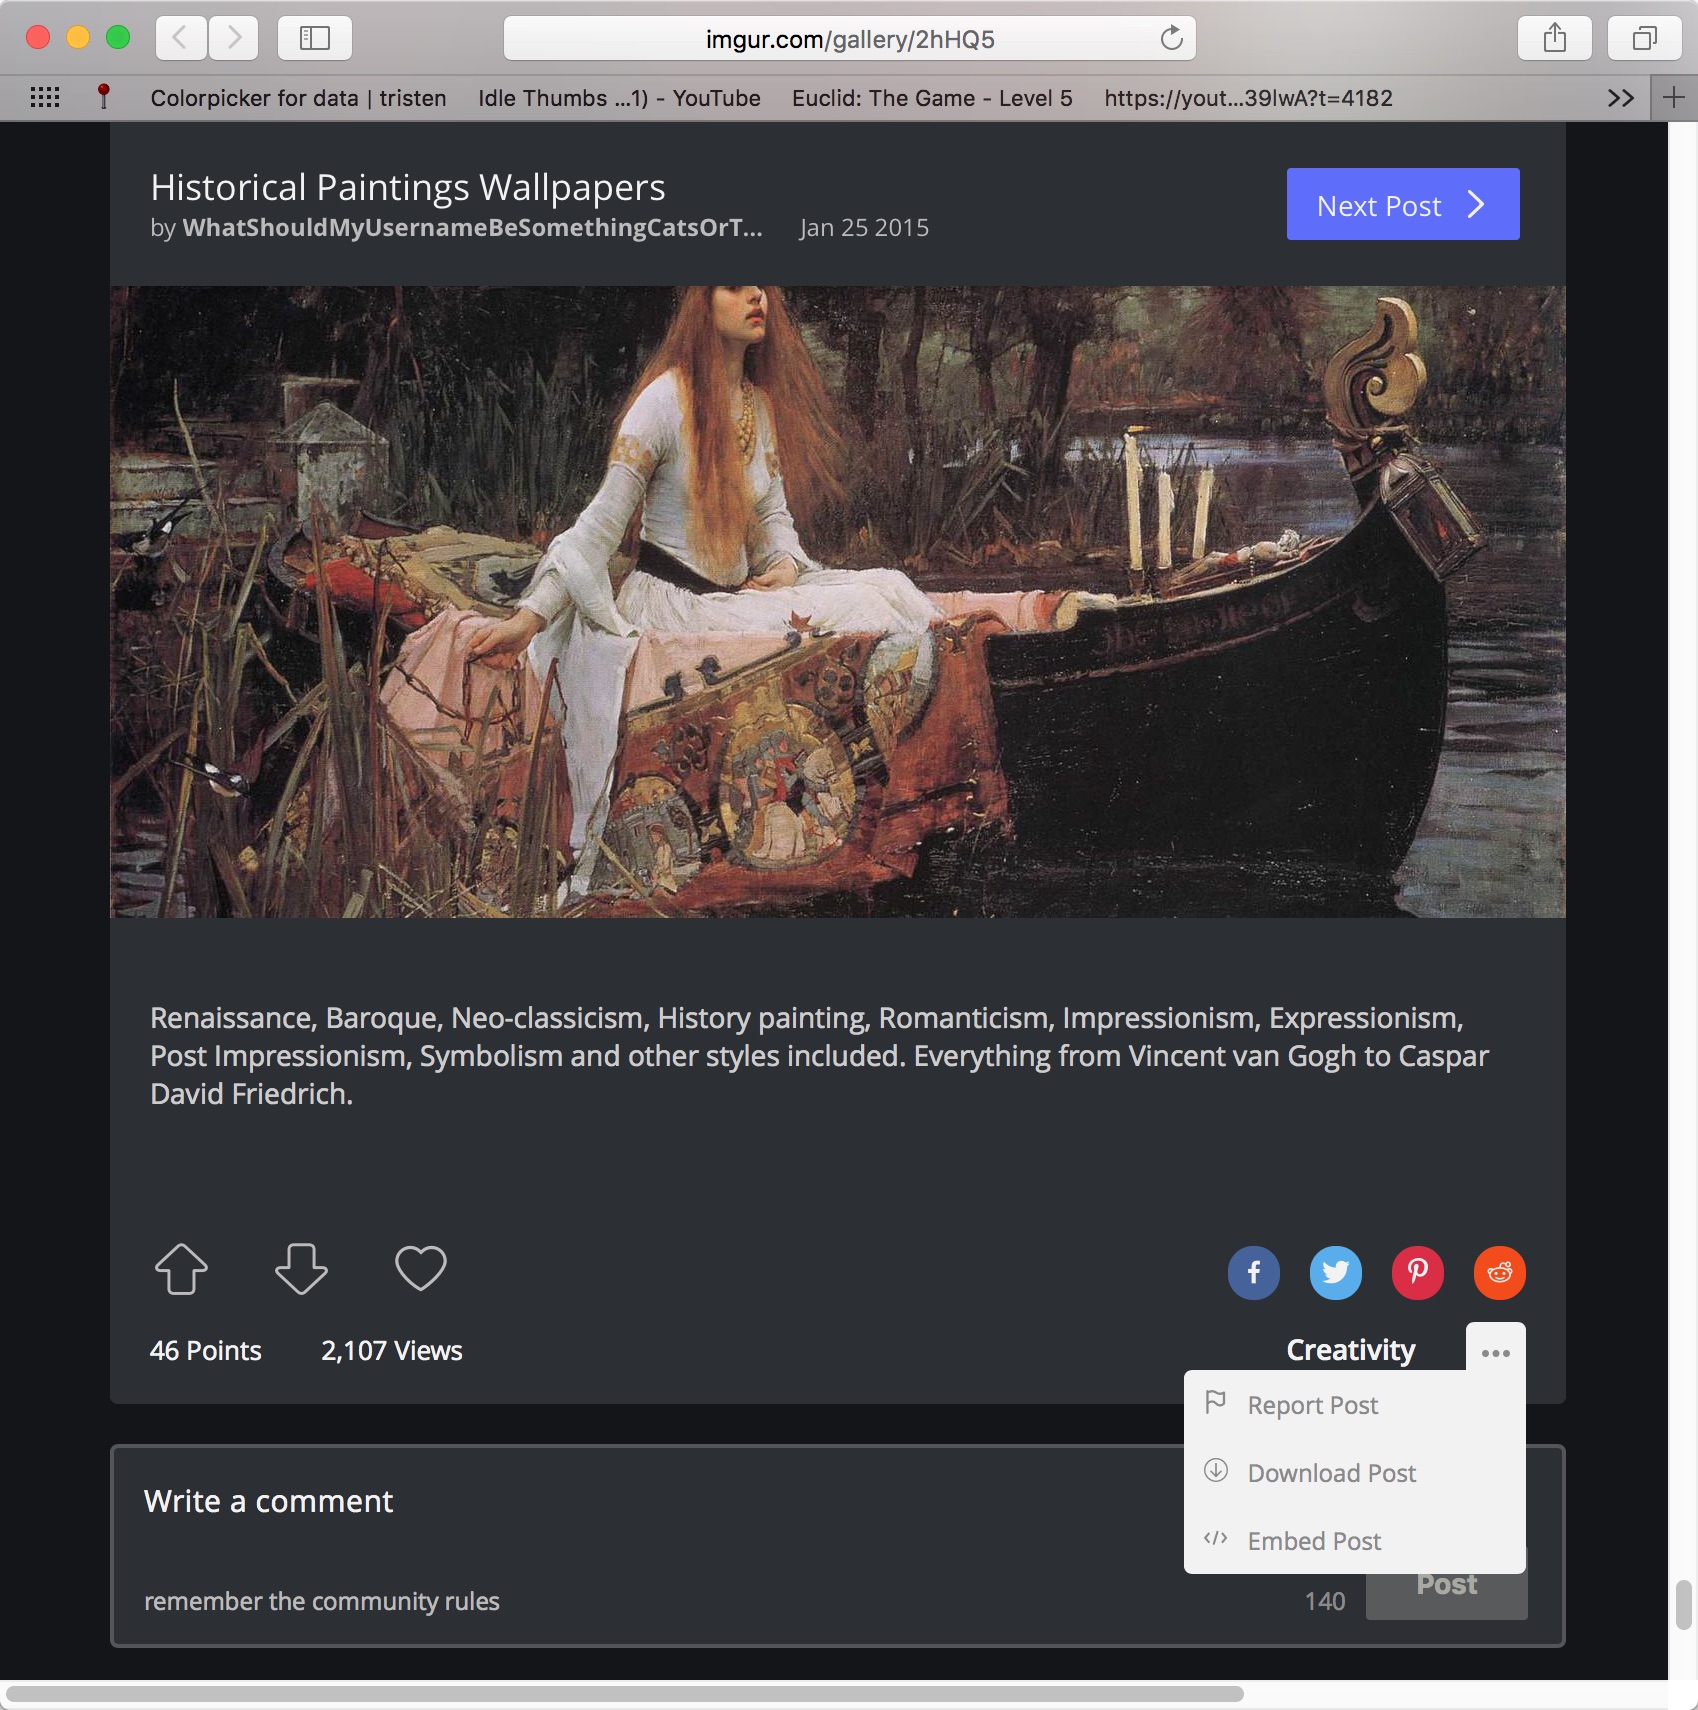
Some people want their art carefully curated, and there are a number of existing apps and services for that. (See the aforementioned Artful and the Google Art Project.) Not me, though! I want everything in my wallpaper shuffle: the “great artists” of the past; modern digital and concept art; Russian textbook illustrations; architectural photography. Much of my daily discoveries come from Reddit, and though the site is an awful cesspool in many respects, subs like r/imaginarylandscapes, r/cozyplaces, r/specart — and even plain old /r/art and /r/photographs — make it all worthwhile. Whenever I run into an interesting new sub specializing in visual art, I immediately sort by the top posts of all time and pull my favorite images from that list. (Fun tip: if you ever run into an Imgur gallery that you particularly like, you can find a link at the bottom to download the entire collection as a zip! I’ve done this with things like Miyazaki backgrounds.)
If you’re interested in scouring some of the less savory parts of the web, there are Russian torrent sites featuring comprehensive collections of art from practically any famous artist or museum you could think of. There’s nothing particularly unethical about this approach — a lot of older art is at this point public domain, after all — and it’s quite an experience to drop “The Best of the Louvre” into your background rotation for a week.
Running every single file through Backgroundifier and plonking it in your wallpaper folder is bound to be a chore. Fortunately, this can be entirely automated using Backgroundifier’s command-line mode and macOS’s native Automator.
Harnessing the Command Line
Although Backgroundifier presents a user-friendly GUI, it can also be accessed through the command line. (To see how one can make such a dual-mode app in Swift, you can examine my code here.) One way to do this is to navigate to your Backgroundifier.app bundle in Terminal and run the Backgroundifier executable found in the Contents/MacOS subdirectory. With the standard --usage flag, you can view all the options available to you. (Some of these aren’t even accessible through the GUI!)
The simplest way to process a file is to run Backgroundifier -i /path/to/input_image.jpg -o /path/to/output_image.jpg -w 1920 -h 1080. Unfortunately, due to the fact that Backgroundifier is a sandboxed app, you can’t just do this for any random directory. Whereas a sandboxed GUI app can expand its sandbox to include any directories opened through the file picker or dropped directly onto it, command line apps (to my knowledge) have no such ability. You can therefore only process files located in your ~/Pictures directory.
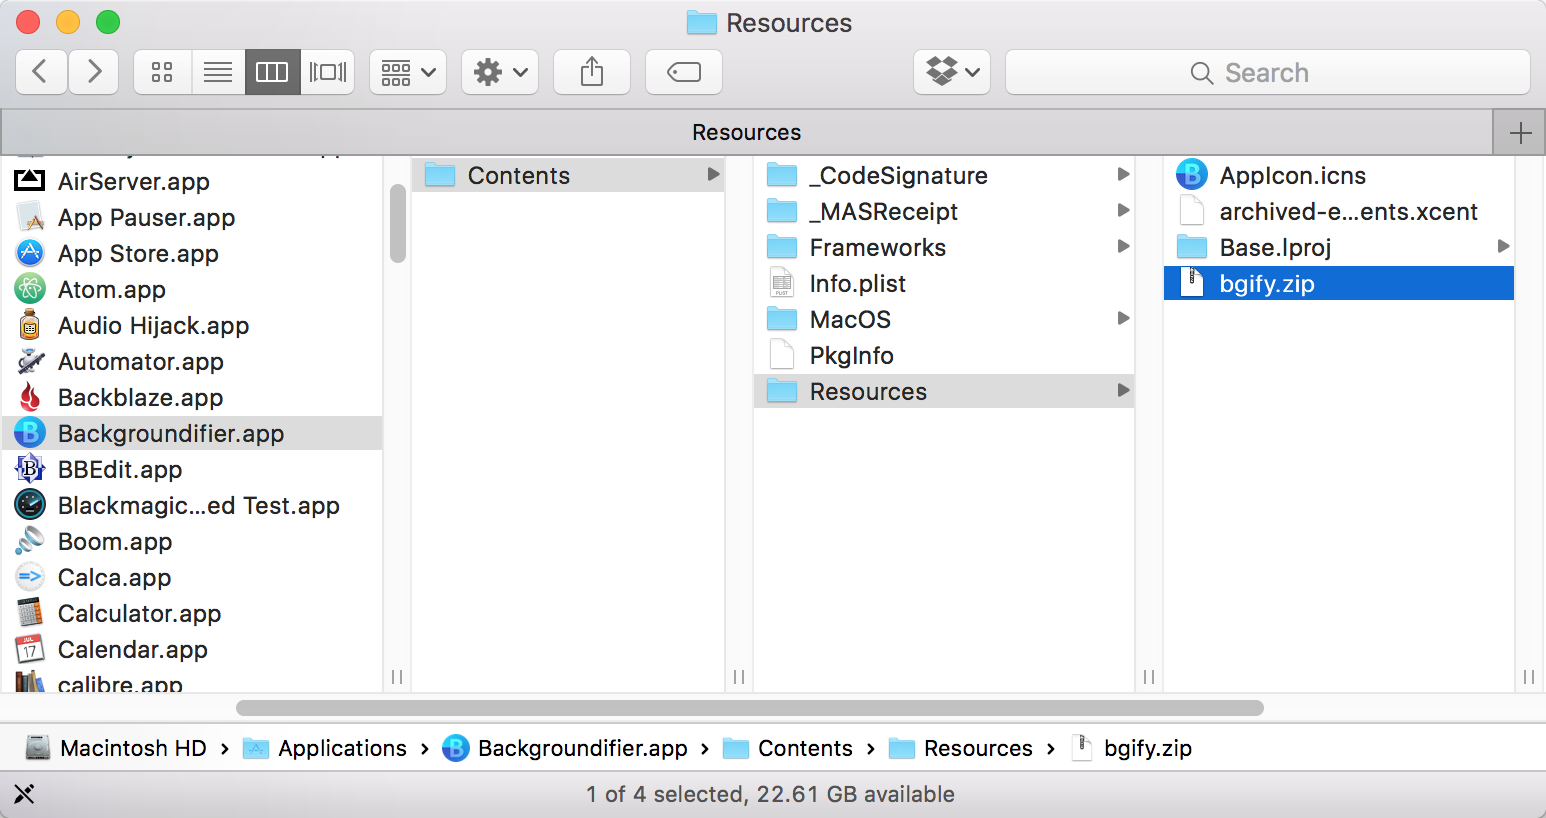
Fortunately, there’s another way. In the Resources directory of Backgroundifier.app bundle, there’s a zip file containing a non-sandboxed, Developer ID signed version of the command line tool. Extract it and you can use it in any directory you please.
Magic Folders with Automator
Automator, macOS’s powerful visual scripting tool, can be used to create so-called “Folder Actions”, or workflows that run whenever the contents of a predetermined directory are changed. As you might expect, this is ideal for file conversion. Below is my Folder Action workflow for automatically “backgroundifying” images into a separate output directory:
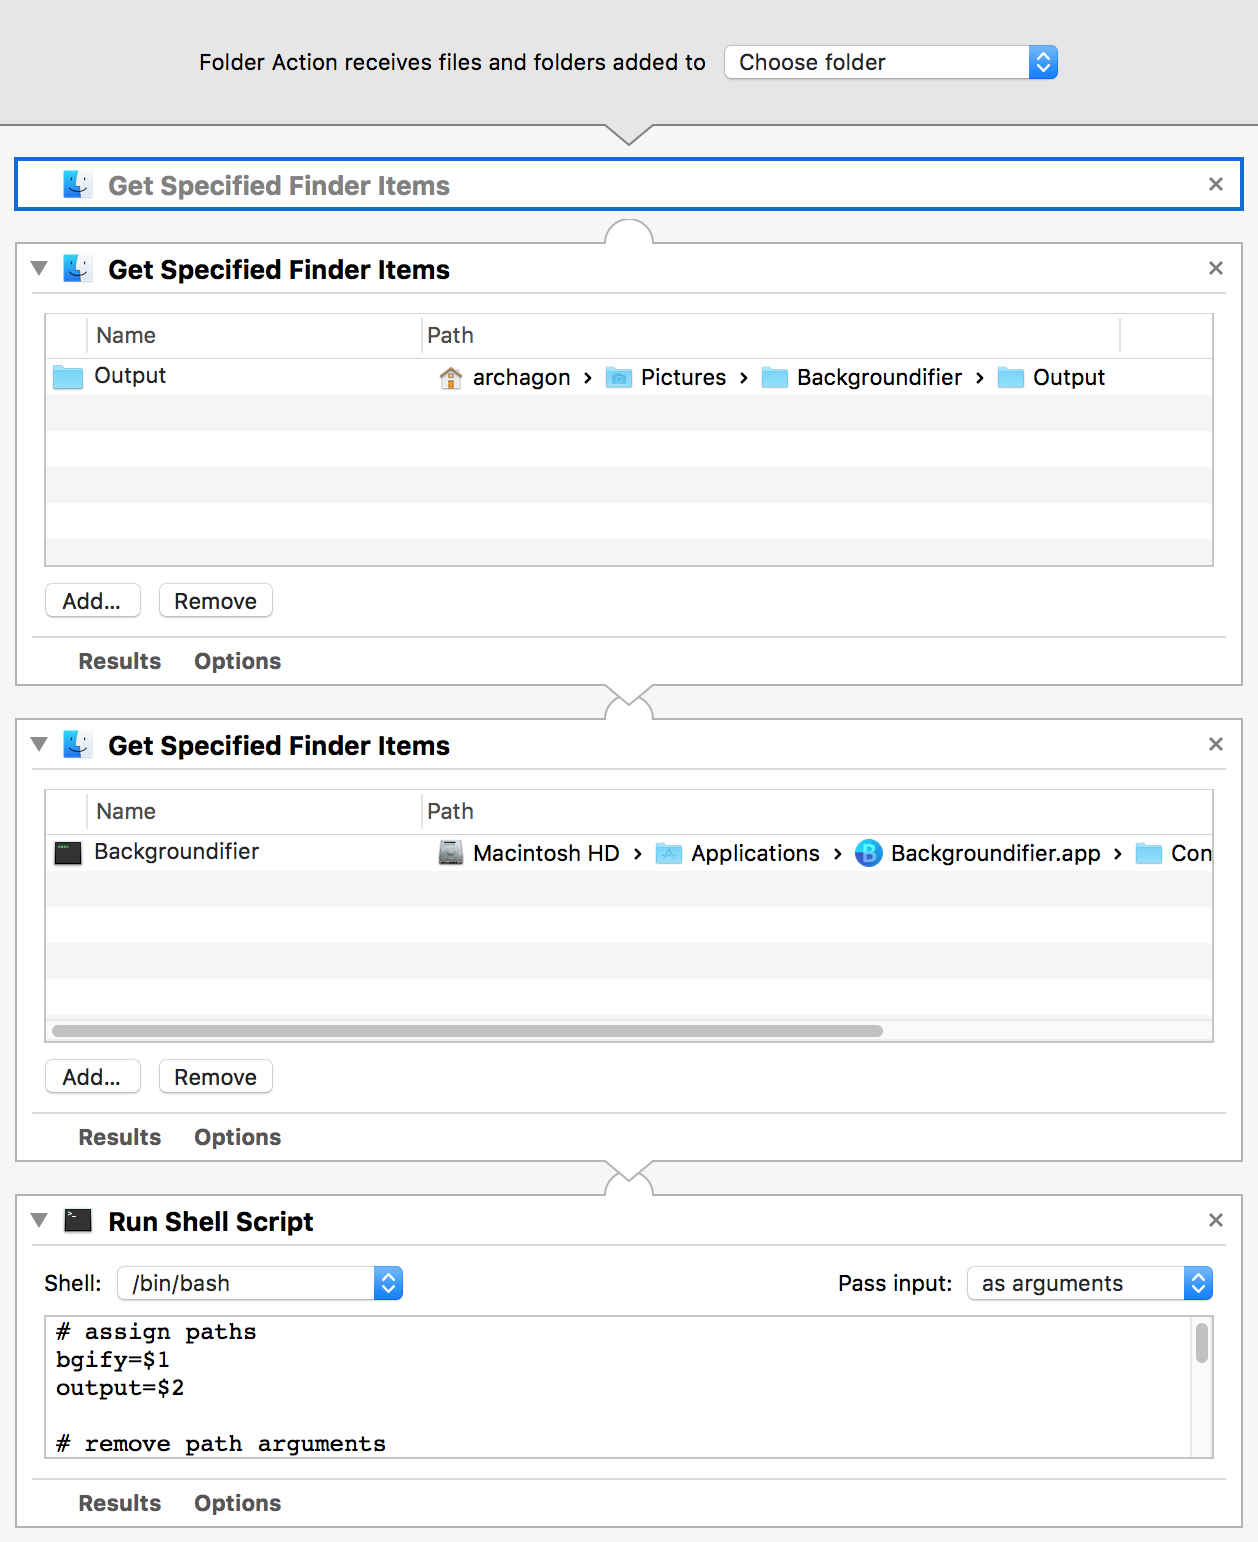
Item 2 contains the path to the output directory and item 3 contains the path to the Backgroundifier command line utility. (They exist as separate items to make the paths easy to modify without having to resort to scripting.) Here’s the full text for the script in item 3:
# assign paths
bgify=$1
output=$2

# remove path arguments
shift 2

# process images
for var in "$@"
do
    filename=$(basename "$var")
    full_output="$output/$filename"
    echo "Processing $full_output ..."
    "$bgify" -i "$var" -o "$full_output" -w 2560 -h 1600
done
Nothing too complicated! You can find the workflow file here, and I assume you can just drop it into your ~/Library/Workflows/Applications/Folder Actions directory. You can also pretty easily recreate it from scratch: just make a new Automator workflow with a Folder Action document type and copy the items.
Whenever I find an interesting new image on Reddit, all I now have to do is drag-and-drop it straight from my browser into the designated Input directory on my desktop. macOS and Backgroundifier automatically take care of the rest.
Dealing with the Desktop
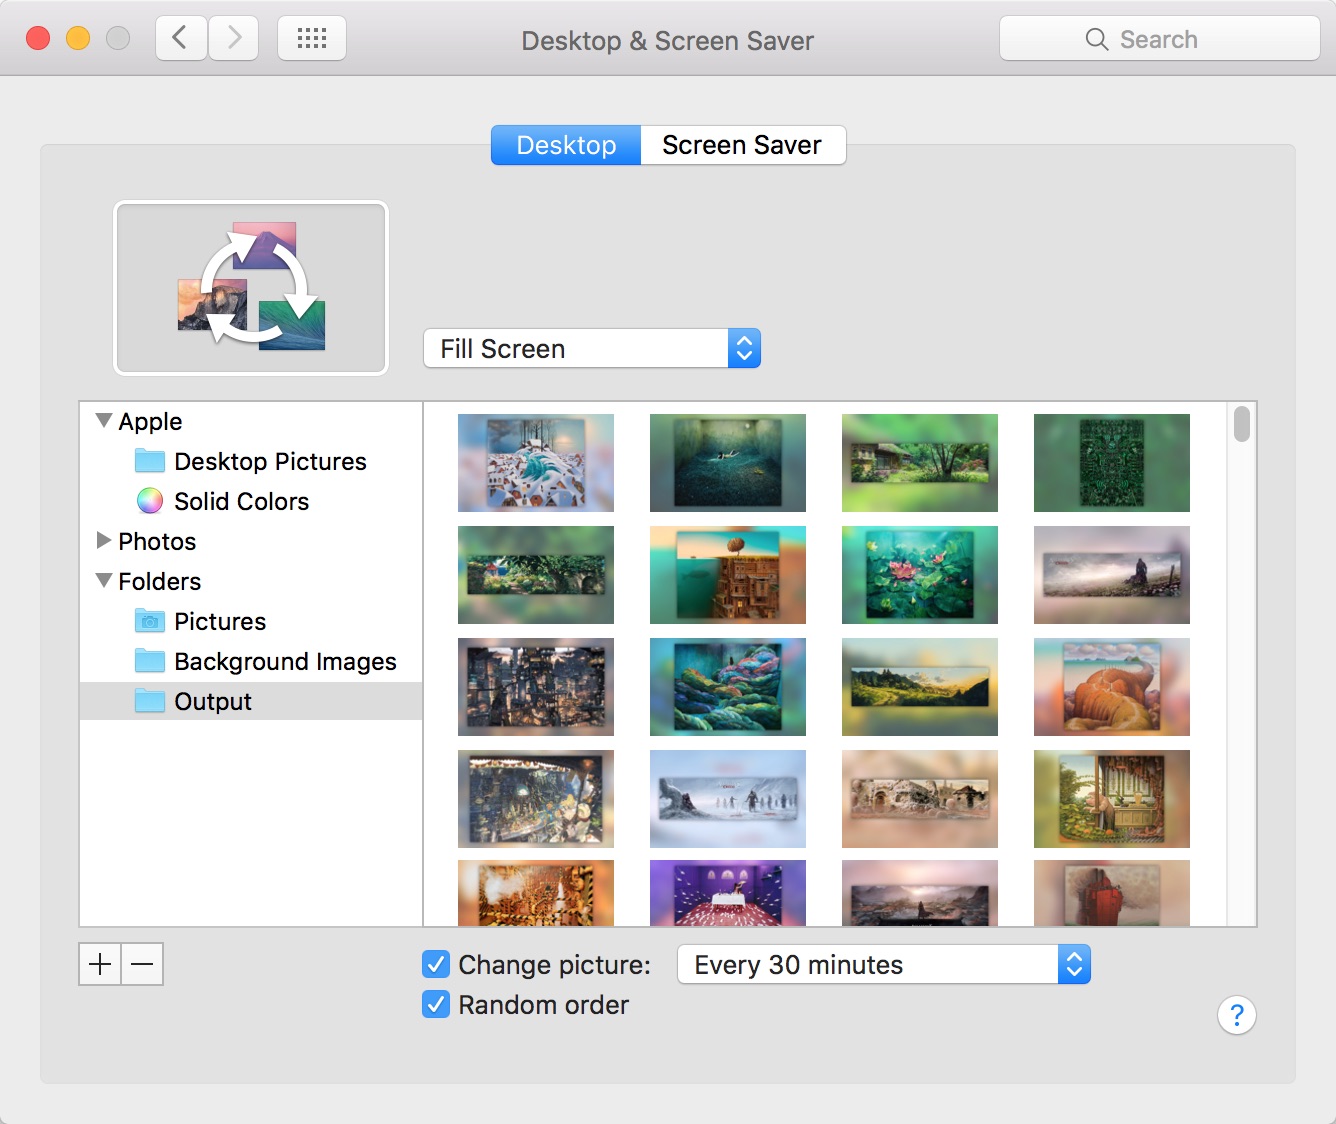
macOS’s desktop background settings allow us to pick a source directory and change the background to a random image at a set time interval (with 30 minutes being the default). All we really need to do here is drag the output directory from the previous step into our list, select it, check “Change picture” and “Random order”, and set our desired time interval.
It’s no fun to manually move every window out of the way whenever you want to peek at your wallpaper. Fortunately, there are several macOS-native shortcuts for showing the desktop. One is to use a four-finger trackpad pinch, selectable under Trackpad → More Gestures → Show Desktop in System Preferences. Personally, I prefer binding the action to a keyboard shortcut: Command-Option-down, to go with my assigned Command-Option-left and right shortcuts for switching spaces. You can do this under Keyboard → Shortcuts.
Some of us are… more messy than others. The desktop can acquire quite a bit of cruft over time, blocking view of the beautiful art below. But why bother cleaning it up when you can just sweep the mess under a rug? If you’re lazy like me, you can toggle visibility for the icons on your desktop by running this simple script:
#!/bin/sh
# Toggles desktop icons.

if [[ $(defaults read com.apple.finder CreateDesktop) = false ]]; then
    echo "Showing desktop icons."
    defaults write com.apple.finder CreateDesktop true
else
    echo "Hiding desktop icons."
    defaults write com.apple.finder CreateDesktop false
fi

killall Finder
And voilà! Clutter-free art with hardly a fuss.
Spaces & Showing New Art
Here’s where it all comes together. One my favorite macOS features is Spaces, or virtual desktops. Spaces have an extra hidden benefit for our use case: whenever a new Space is created, its desktop background settings are taken from the previous space. This means that any new Space created in our configuration will automatically arrive with a fresh work of art in tow!
Whenever you wish to see a new work of art, just pop open Mission Control (in my case, bound to Command-Option-up), create a few new Spaces, and keep switching Spaces to the right. It’s just like leafing through an art book!
And that’s all it takes to create your own personal art gallery using Backgroundifier. No mysterious system overrides or hacks. No 3rd party tools of unknown provenance. Just a Unix-y converter, an Automator script, and a couple of native macOS features to tie it all together.
It’s quite a thing knowing that a new, enriching artistic discovery — be it a Picasso, a Van Gogh, or even a Mike From Around The Web — is only a quick peek away!
—Archagon
September 19, 2016