
AORUS 1080 eGPU + USB Boot Camp on a 2018 13" MacBook Pro
Dec 26, 2018 technology reviews
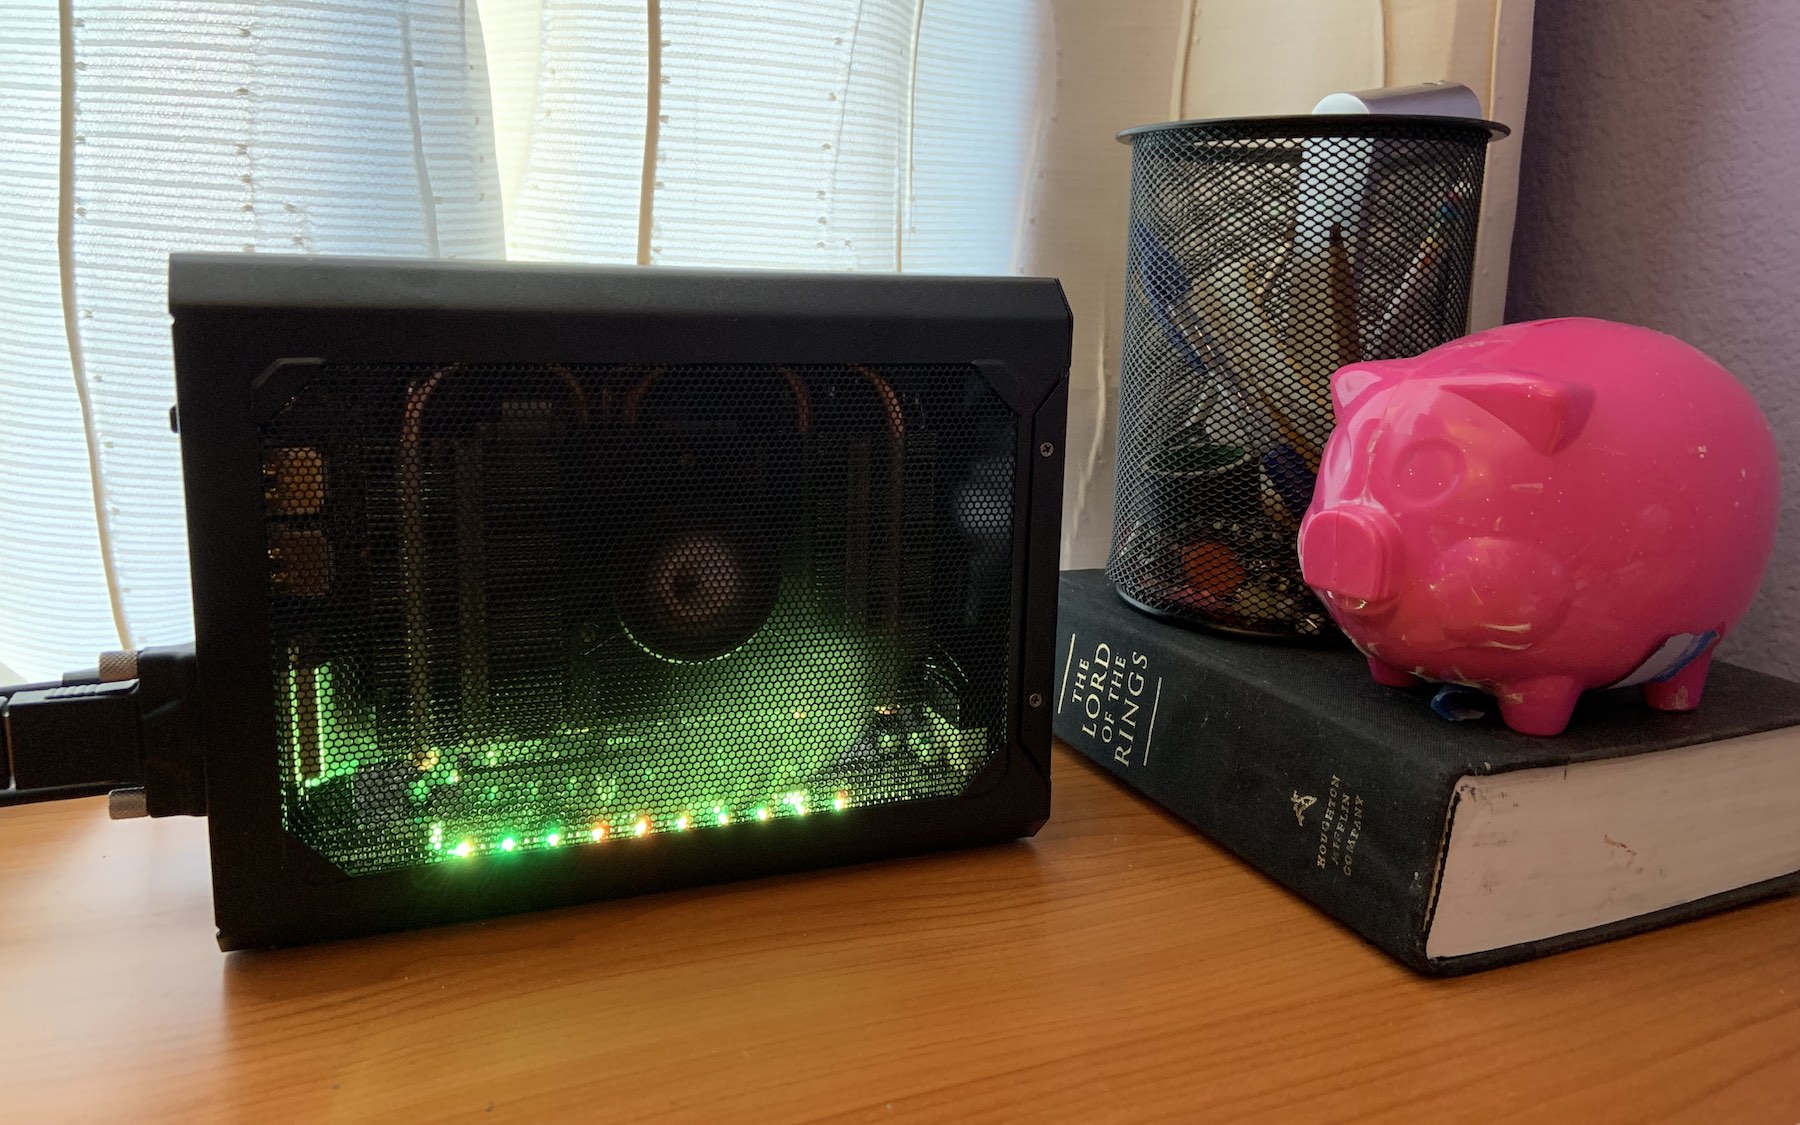
Previously in my eGPU saga, I stuck an Nvidia 1080 in an AKiTiO Thunder2 enclosure, hooked it up to an old PC PSU, and got the contraption working on a late 2013 15” MacBook Pro. In fact, the end of the article wasn’t quite the end of the story: I ended up returning the stock 1080 and purchasing a fully-fledged AORUS GTX 1080 Gaming Box on sale. The price after rebates was, ridiculously, cheaper than the 1080 by itself, and the card was easily removable and absolutely identical to the retail 1080 modulo fan size (I ran benchmarks to confirm this), so it would have been foolish not to swap. My specific MacBook model couldn’t support a TB3 eGPU even with a TB2–TB3 adapter, so I popped out the AORUS card, stuck it in my Thunder2, and left the enclosure for another day.
Well, that day is today! Having recently gotten my hands on a late 2018 13” MacBook Pro, I figured I’d give the AORUS a shot. Would it be just as easy to get working? How would this slightly-more-supported TB3 setup differ from my I-can’t-believe-it’s-actually-running TB2 tangle?
Windows on a USB Drive
My first priority, though, was to avoid creating a Boot Camp partition on this new machine if I could help it, since I didn’t want to permanently mess around with the disk layout. Could I install Windows on my handy 500GB solid-state USB drive instead?
At first, I figured I’d just clone my existing Boot Camp partition and call it a day. Doing so in Disk Utility was a breeze: simply wipe the drive, create a new partition using the default settings, right-click on the name, click “Restore”, and pick the Boot Camp drive. Sadly, this clone failed to materialize in the hold-Option-on-boot Startup Manager: a simple copy didn’t transfer the requisite (MBR?) metadata.
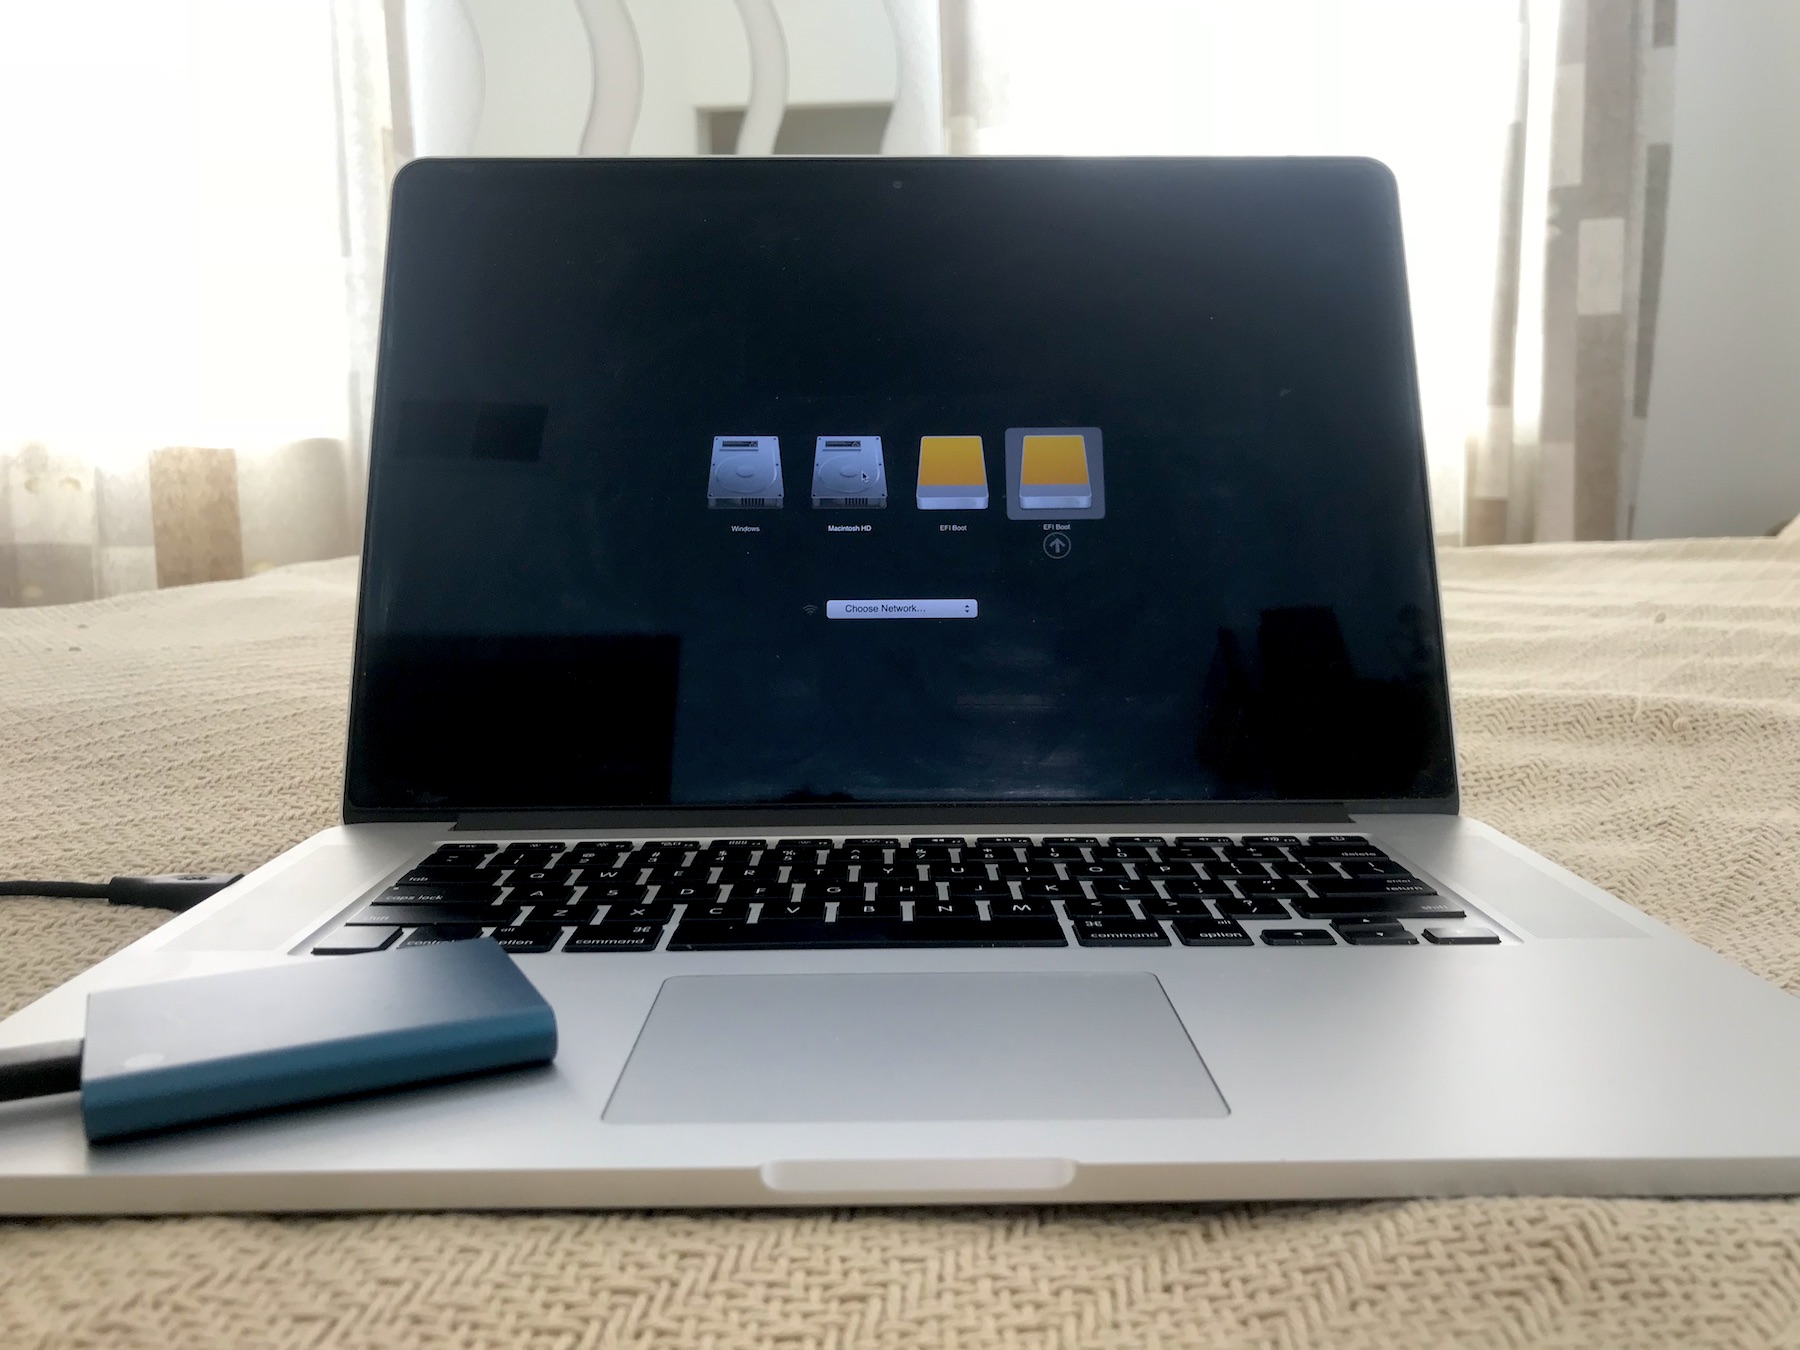
Next, I downloaded a tool that promised to make an easy, bootable clone of the Boot Camp partition: Winclone. The trial was limited, so I bought the full version in hopes of resolving my issue quickly. Cloning Boot Camp was indeed a breeze, and a new option named “EFI Boot” did in fact show up in the boot menu. (This was confusing at first, but I later learned that there was seemingly no way to rename this partition.) Sadly, even though the Windows logo did appear after selecting this option, I was invariably smacked with a “INACCESSIBLE_BOOT_DEVICE” BSOD a few seconds afterwards. Apparently, this was a driver issue: Windows couldn’t find the necessary Boot Camp drivers to fully load the OS from a USB drive (or something along those lines). Winclone offered some helpful advice for fixing this, but nothing I tried seemed to work. Also, several others had the same problem with seemingly no resolution. Fortunately, the company offered a generous refund policy and I quickly got my $40 back. (I should note that the software seemed featureful and well-engineered, but my use case was probably esoteric enough to fall through the cracks.)
I decided to give up on cloning my existing partition and settled on creating a fresh Windows install instead. This came with its own challenges. Although there was a version of Windows called “Windows To Go” that was designed for external drives, it was limited to Education or Enterprise versions of the OS. Fortunately, third-party Windows apps were available for creating a To Go installer from a regular Windows ISO, which was downloadable directly from Microsoft. One of these apps was called WinToUSB and proprietary; the other was Rufus and open source. I ultimately went with WinToUSB since it was mentioned most often in guides. (When I gave Rufus a quick try, it appeared to work just as well, but there were some minor quirks such as the USB drive not being selectable under Startup Disk in macOS System Preferences.)
Setting up Windows using these tools seemed daunting from guides (38 steps!!), but most of the difficulty was centered around finding an existing Windows installation to run WinToUSB or Rufus from, which I already had. First, you partition your USB drive with the default settings in macOS. While you’re in macOS, use Boot Camp Assistant to download all the necessary Windows drivers from the Action menu. (These arrive as a 2GB WindowsSupport directory in Downloads.) Next, find a Windows machine, virtualized or otherwise. Use Disk Management to delete your USB drive’s new HFS+ partition and replace it with an NTFS partition. Then, run either WinToUSB or Rufus with the official Windows 10 image from the Microsoft site as the ISO. Move the previously-downloaded WindowsSupport folder to the root of your USB drive. (This is solely for ease of Apple driver installation after installing Windows. The installer doesn’t itself use these files.) Reboot while holding Option and you should see a new “EFI Boot” option. Select this and you should be able to install Windows To Go!
In theory, anyway. In practice, I ran into a few more problems. First, kudos to the WinToUSB and Rufus teams: the software was dead-simple to use and performed exactly as advertised. However, I kept crashing with a new “DRIVER_UNLOADED_WITHOUT_CANCELLING_PENDING_OPERATIONS” BSOD before the Windows installer got anywhere. Scouring the web for advice, I found a Reddit thread suggesting that Windows 10, version 1809 had a bug that failed on UASP drives, which mine apparently was. The Microsoft site also offered version 1803 for download, so I went through the WinToUSB dance once again with the new ISO. This made it finally possible to complete the installation.
After getting into Windows, I found that my keyboard and trackpad weren’t functional. I had seen somebody mention that Touch Bar MacBooks experienced this issue without official drivers, so I plugged in an external keyboard and mouse and was able to log in. I then ran the installer in the BootCamp folder under the previously-transposed WindowsSupport folder at the root of the drive. The installer seemed to hang at 100%, but I thought nothing of it and rebooted. That last 0% must have been important, though, because while my keyboard and trackpad were now producing output, using them invariably caused a new type of BSOD to appear several seconds down the line. I ran the driver installer again; it completed successfully this time, and there were no more input-related crashes on reboot. Just to be sure, I checked Device Manager for anything odd and discovered a couple of Intel chipsetty things with missing drivers. These I fixed by right-clicking each one, selecting “Update Driver”, and pointing to the BootCamp folder. There was one last question-mark-laden “Unknown device” under the “Other devices” category that I couldn’t find drivers for in the BootCamp folder or even through Windows Update, but discussions on the web seemed to indicate that it was a harmless artifact of the T2 chip and didn’t belong in Device Manager anyway.
At this point, my machine state was on par with that of a legit, internal Boot Camp setup. Hooray: Windows was actually running on an external drive!
Setting Up the eGPU
Next, it was time to get the AORUS box working.
My first attempt was to boot into Windows and just plug it in. First issue: I got a suspicious error notification saying that “Thunderbolt device functionality might be limited”. After poking around in Device Manager and seeing the eGPU listed in the USB section, I realized that I was using a non-TB3 USB-C cable. The real one looked almost identical, but had little lightning icons on the plugs. Oops!
After switching cables, I tried repeating the experiment. Something strange happened this time: the “plugged in” chime sounded, and notification animations continued to play, but all my inputs simply stopped working (both internal and external). With my old TB2 setup, hot-plugging would either do nothing or cause a freeze (don’t recall which), so this was at least a step in the right direction.
Next, I tried plugging in the eGPU with the computer off, then booting. Everything started out fine, but the boot process seemed to hang on the Windows logo. Notably, the eGPU seemed to power cycle several times during this process based on the fan noise, so I figured it was some sort of driver loading issue.
After flailing around for a bit, I consulted egpu.io’s Boot Camp guide and decided to try out apple_set_os.efi. (In brief: if you put a bunch of special EFI-related files on a USB drive, you’ll see a new “EFI Boot” option in Startup Manager. Selecting this option will boot you into the default OS while tricking the computer into thinking you’re booting into macOS. The primary benefit is forcing the Intel iGPU to still work with the eGPU plugged in, allowing you to continue using the internal display.) Since I was already booting from an external USB drive, all I had to do was shrink my new Windows partition in Disk Management (from my existing Boot Camp installation), then add a 200MB FAT partition after it. I was worried that maybe this partition wouldn’t appear in Startup Manager on account of MBR shenanigans, but the second “EFI Boot” option appeared just fine.
After setting my default OS to the USB Boot Camp partition in Startup Disk, I rebooted, plugged in the eGPU, and selected the new startup option. At first, nothing happened: I just kept booting right back into macOS. After a few tries, I realized that I had to shut down successfully from Windows in order for this trick to trigger, whereas I was continuously hard-resetting in the middle of Windows boot on account of the eGPU still being plugged in. I unplugged my eGPU, booted and rebooted Windows, and tried the second EFI partition once again. This time I got Windows, and instead of freezing on the Windows logo, I actually managed to get to the login screen. Various animations and sounds were playing and notifications were popping up, but my inputs remained disabled.
Based on a hunch, I decided to shelve the apple_set_os.efi approach, boot the standard way, and plug in the eGPU just as soon as the spinner appeared in the Windows boot sequence. To my delight, this actually worked! I was able to log in and saw an unknown device under “Display adapters” in Device Manager, just as I had with my original TB2 eGPU. At this point, I knew that once I installed Nvidia drivers, everything would be peachy keen.
(A bit of an aside, but OH MY GOODNESS: is Windows pushy with its updates or what? You normally can’t turn them off at all, and the only postponement options you get are to prevent installation for up to 35 days, inhibit feature updates for up to a year, and avoid force-restarts on installation during active hours—so long as they’re no longer than 18 hours. Microsoft, do you think this is your own personal machine to futz with as you please? Was there any thought put into this at all? What if I’m running Windows from a personal hotspot with high data limits, or trying to avoid frustrating my housemates with multi-gigabyte downloads at arbitrary times? Lay off or I’m going to lay waste to your registry, group policies, host file, and anything else required to make this insidious behavior go away. Sigh…)
Anyway, I was confused at first why the Nvidia installer was giving me lip for trying to run concurrently with another installer. Turns out this was just Windows Update doing nefarious deeds behind my back. After my updates were complete, I could install the Nvidia drivers sans difficulties, and I could then reboot with the eGPU plugged in without any special incantations. With apple_set_os.efi disabled, my laptop screen would still freeze on the Windows logo, but my external display would light up with the login screen. Going through apple_set_os.efi allowed both screens to function independently. In both cases, my input devices were now working fine. Like in my TB2 setup, I disabled the laptop screen in Display Settings to guarantee that I was getting hardware acceleration from the eGPU and not the iGPU. (This time, though, I didn’t check if it was strictly necessary.)
But lo, a new problem! While running my standard 3DMark benchmarks, I discovered that the tests were performing at the expected FPS, but freezing for seconds-long stretches several times a minute. After changing a bunch of local settings to no avail, I discovered that the AORUS ENGINE eGPU control software I had incidentally installed was (for whatever reason) causing these weird lag spikes. Disabling this app on login fixed the problem. (Opening it after login, however, seemed to work without issue.) The benchmarks turned out to be nearly identical to that of my TB2 setup, showing that TB2 wasn’t a limiting factor at all with the 1080. The 20% penalty still applied.
The next day, I ran into several new issues. After plugging in the eGPU and booting the regular way, I found myself stuck on the Windows logo once more. Eventually, I realized that you had to use the same TB3 port you started with for your eGPU, or else you’d have to install your Nvidia drivers all over again. I also discovered that booting from the apple_set_os.efi partition didn’t always work as expected: sometimes, the card would go into “leaf blower mode” (max fan speed) and only the internal display would turn on. You could usually fix this by waiting to plug in the eGPU until Startup Manager appeared. (No leaf blower = probably good to go.) Fortunately, booting the regular way seemed to work pretty much every time.
Conclusion
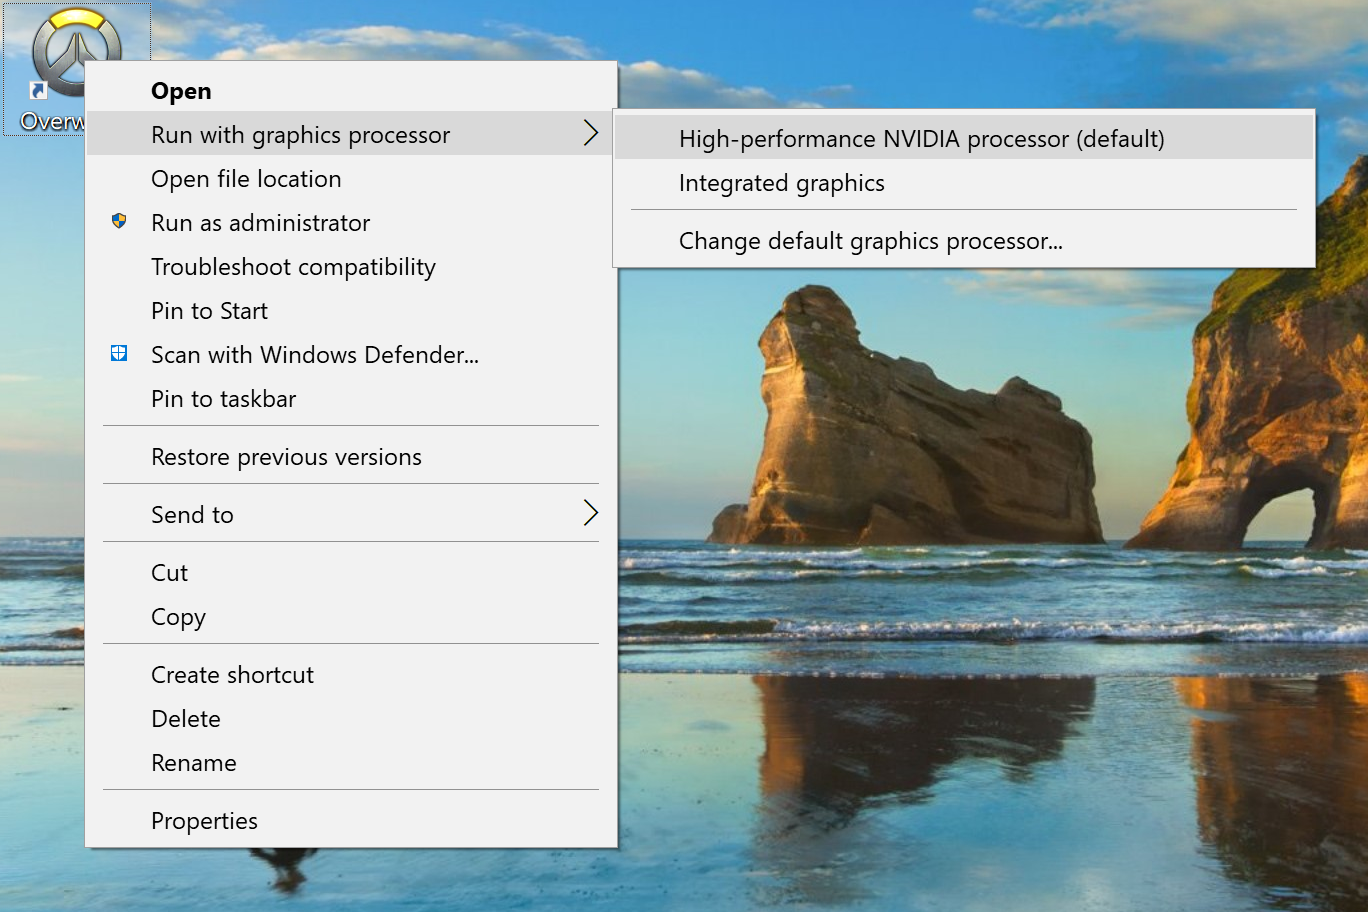
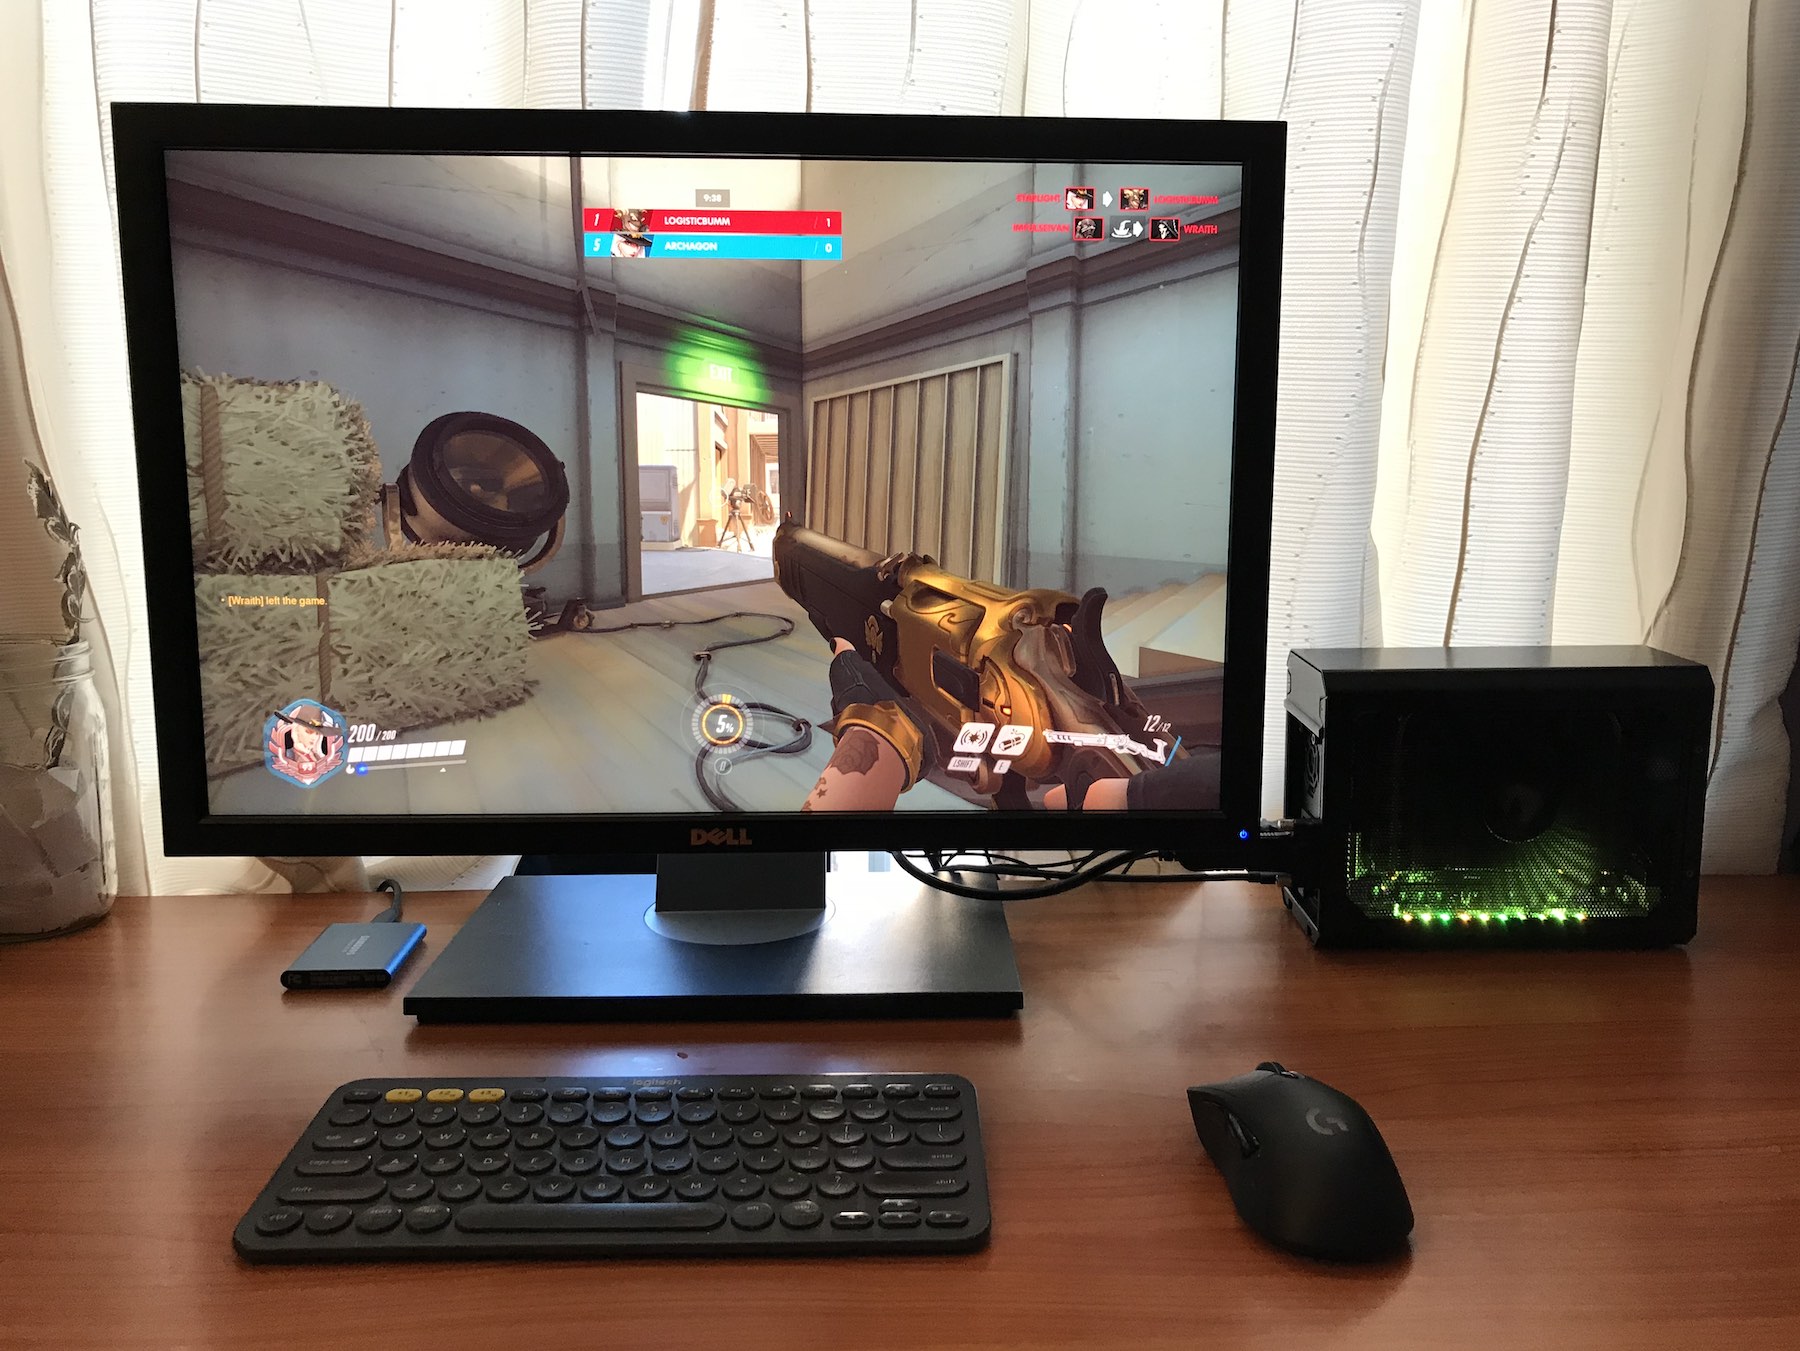
In keeping with the theme of “simple over featureful”, my AORUS setup requires no fiddly system hacks or scripts to work, but is only usable from Boot Camp, not macOS. However, it’s also a substantial step up from my old TB2 setup. For one, there’s no longer any need for constant vigilance on boot: simply plug the box in and hit the power button. Better yet, you can actually accelerate the internal display with no extra effort! In lieu of Optimus, the latest Windows 10 has a new feature called “Hybrid Graphics” that lets you pick the GPU that any app will run on. All you have to do is right-click your game and select the eGPU under “Run with graphics processor”. (If you’re running through Steam, it may be sufficient to run the Steam app itself using the eGPU, but I’m not 100% sure.) The only prerequisite is booting from the apple_set_os.efi partition in order to light up the internal display.
I hear that MacBooks with integrated AMD graphics might require additional steps to get everything working, so YMMV. Luckily for me, after stumbling through the installation, this particular setup was almost entirely problem-free. Error 12 did not crop up even when stressing the hardware to its limits (full Oculus Rift setup and all four TB3 ports occupied). I did find, however, that my headphone volume was substantially and irrecoverably lower than it needed to be, which forced me to invest in Apple’s new USB-C-to-3.5mm adapter as a workaround. (Word of warning: it seems that Windows freezes if you try to hot-plug this adapter while an eGPU is attached!) Several guides issued warnings about running Boot Camp from an external drive when using an eGPU, citing potential driver priority problems. Thankfully, I experienced no such difficulties here.
Hardware-wise, the AORUS is an excellent eGPU. In terms of size, it’s almost certainly the smallest box you can get for a card this powerful. The PSU is internal, so power is entirely provided by a standard C13 cable. (No unwieldy bricks here.) The USB-C connection conveniently powers your Mac, opening up a spare port on the machine. There are also several USB-A ports on the box itself, though I did find that plugging in an external drive caused power cycles on several occasions. (Probably best to use these ports for simple accessories.) To top it all off, it comes with a cute, lunch-box-sized carrying case!
If you’re sporting a late 2018 13” MacBook Pro and are mostly interested in Windows gaming, I highly recommend investigating the AORUS GTX 1080 Gaming Box as an easy and affordable eGPU option.
You can find a discussion of this article on ![]() .
.
—Archagon
December 26, 2018